-

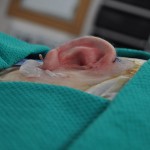
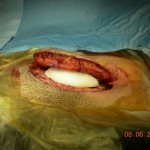
- Stage 1 of Rib Graft (Rib Graft, carve rib, insert into skin pocket on head where ear belongs, vacuum or suction skin to ear)

-
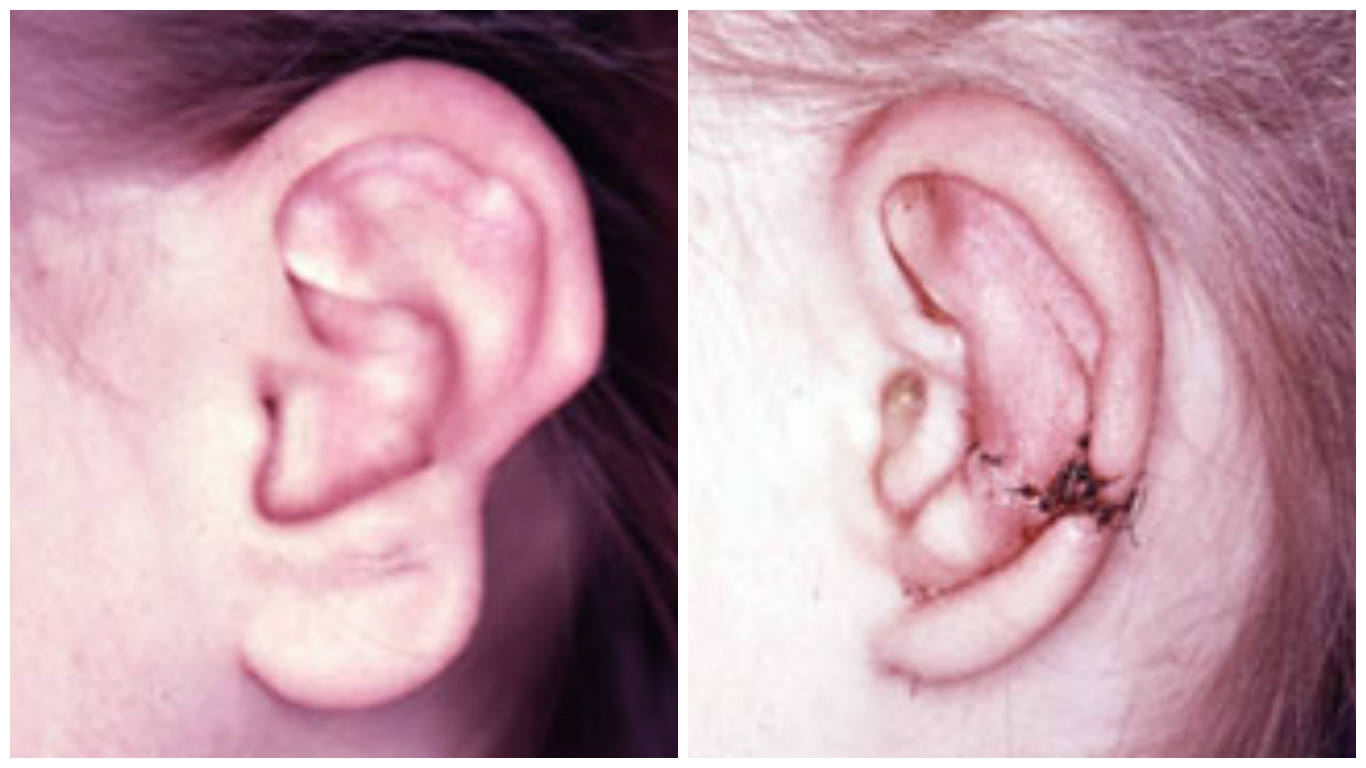
- Stage 2, elevation stage to give ear projection (lift away from the head)

-

- Stage 3 of Rib Graft, forming the tragus (the area of cartilage in front of the ear to provide depth of a canal
-

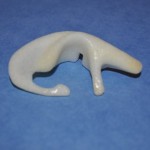
- Rib graft ear framework. (Vanderbilt)

-

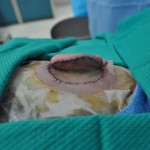
- Soft tissue reconstruction by Dr. Roland Eavey. (Vanderbilt)
Permission to post the above surgical images has been granted by Dr. Arturo Bonilla and Dr. Roland Eavey. Rib Graft surgery can be completed anywhere from 1 stage up to 7 stages depending on the surgeon you go to, if scar tissue is in the way, or other challenges such as a low hair line, etc… However, today Rig Graft is commonly performed in two to three surgeries depending on the surgical technique that is chosen.
-
- Only Dr. Arturo Bonilla utilizes a piece of Medpor framework to insert behind the ear during the elevation stage

-
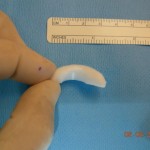
- Carved away wedge insert from Medpor to insert behind the ear during the elevation stage.

-
- Medpor wedge inserted behind Rib Graft ear during elevation stage (stage 2)

-
- Medpor wedge provides projection for the ear. Some surgeons utilizing the Nagata technique use an additional rib piece for behind the ear

Permission to post the above surgical images has been granted by Dr. Arturo Bonilla a Medpor block during the elevation stage (stage 2) of his Rib Graft procedures.
-

- Bethan’s Rib Graft ear (Dr. Neil Bulstrode)

-

- Bethan today after Rib Graft surgery (Dr. Neil Bulstrode)

-

- Daniel with his new Rib Graft ear (Dr. Charles Thorne)

-

- Julian’s new Rib Graft ear (Dr. Arturo Bonilla)

-

- Colin’s new Rib Graft ear (Dr. Neil Bulstrode)

Permission has been granted to post the above images by the children and families of our support group. Thank you for sharing your new ears with all of us.


Leave a Comment
You must be logged in to post a comment.